The WikiMedia Foundation (WMF) provides public access to the MediaWiki code base via a Subversion code revisioning system. For the majority of users who just want to be on the bleeding edge of MediaWiki simply pulling from this public server will suffice, however this only allows users read access to the repository. If you want to be a hardcore MediaWiki hacker you need to request commit access which will allow you to connect over the secure svn+ssh protocol and push your changes back into the core. There are a few prerequisites for gaining commits access, one of which is setting up an RSA key, which will be covered momentarily. Before we begin however, it is highly recommended that you read the entire Commit Access Guide available on the MediaWiki.org site.
NOTE: Though targeting The WMF Subversion server these instructions will be similar for all Subversion connections.
Get the apps
Before any work can be done two applications need to be downloaded, Putty and Tortoise SVN. These two applications will work together to connect you to the Subversion server.
Putty can be downloaded at: http://www.chiark.greenend.org.uk/~sgtatham/putty/download.html
Tortoise can be downloaded at: http://tortoisesvn.net/downloads.html
Run through their installation process and you will be ready to go!
Generating the Key
Access to the MediaWiki Subversion server requires you to first supply an SSH key to the WMF team to setup your account. Generating the key with the Putty Key Generator is quite simple with the following steps:
- Run puttygen
- Click on the Generate button and wiggle your mouse over the blank area.
- Click Save public key and save it somewhere safe. For general convenience you should append “.pub” (Without quotes) to the end of the file name.

- Click Save private key and save it somewhere safe. This private key you will want to keep as secure as possible, as with this key a malicious user could get into your Subversion account and wreak havoc.
Setup a session in Putty
Tortoise SVN uses the Putty sessions to secure the Subversion communication and manage your keys.
- Run putty
- Set the hostname of the server, input a one word session name, and click save

- From the left menu select Connections > SSH > Auth. On this screen is a Browse button. Load the private key you create earlier here. The key should have a “.ppk” extension.

- To make sure your key will always be available go back to the Session page with the left menu and click Save again.
Your Subversion key should now be setup and ready for use in Tortoise SVN
Checkout the MediaWiki files with Tortoise SVN
NOTE: In this section you will pull only one copy of the MediaWiki source to work with. This is just for demonstration purposes. See “Getting started and set up” for proper etiquette.
Tortoise SVN makes interacting with Subversion servers from Windows trivial.
- Create a folder to store the MediaWiki files in
- Right click the folder and select SVN Checkout
- In the dialog box you will checkout with a URL starting with “svn+ssh://username@svn.wikimedia.org”. It is important to note here that “svn.wikimedia.org” DOES NOT refer to the URL of the Subversion server, but rather the session you saved in Putty previously. So if your session name was “awesomeness” you would use “svn+ssh://username@awesomeness”. The rest of the URL will point to the code you desire to checkout, probably the URL svn+ssh://[email protected]/svnroot/mediawiki/trunk/phase3 is what you want.

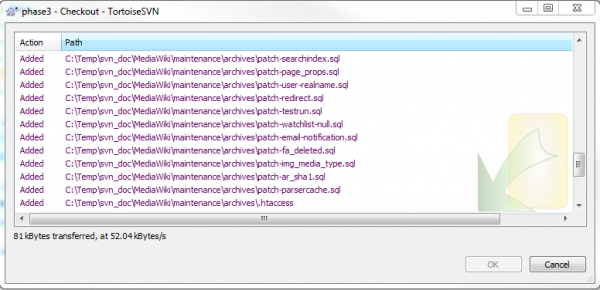
- A new dialog should pop up showing you a list of files that are being downloaded. Go make yourself some tea, this will take a while.

After the checkout completes you will have the MediaWiki code. Get hacking!
Committing back to MediaWiki
Tortoise SVN makes committing code changes back to the MediaWiki repository easy. The following steps will get your code flying back along the wire.
- Right click on the folder containing the MediaWiki checkout
- If you have created new files they need to be added to the commit first
- Hover over the TortoiseSVN menu item and a submenu will pop up
- From this submenu click Add
- And new files will be show in this dialog. Choose the files you wish to include in the commit and click Ok
- Now the really hard part, right click on the MediaWiki checkout again and click SVN Commit
- Fill in a message about your commit and look over the list of changes. When satisfied click OK.
- A new dialog will pop up showing the files being committed and a status message after the commit finishes.
Congratulations! You have successfully committed new code to the MediaWiki Subversion repository and enriched the community. Your code will now undergo a review process and if solid will be released with the next version of MediaWiki.